

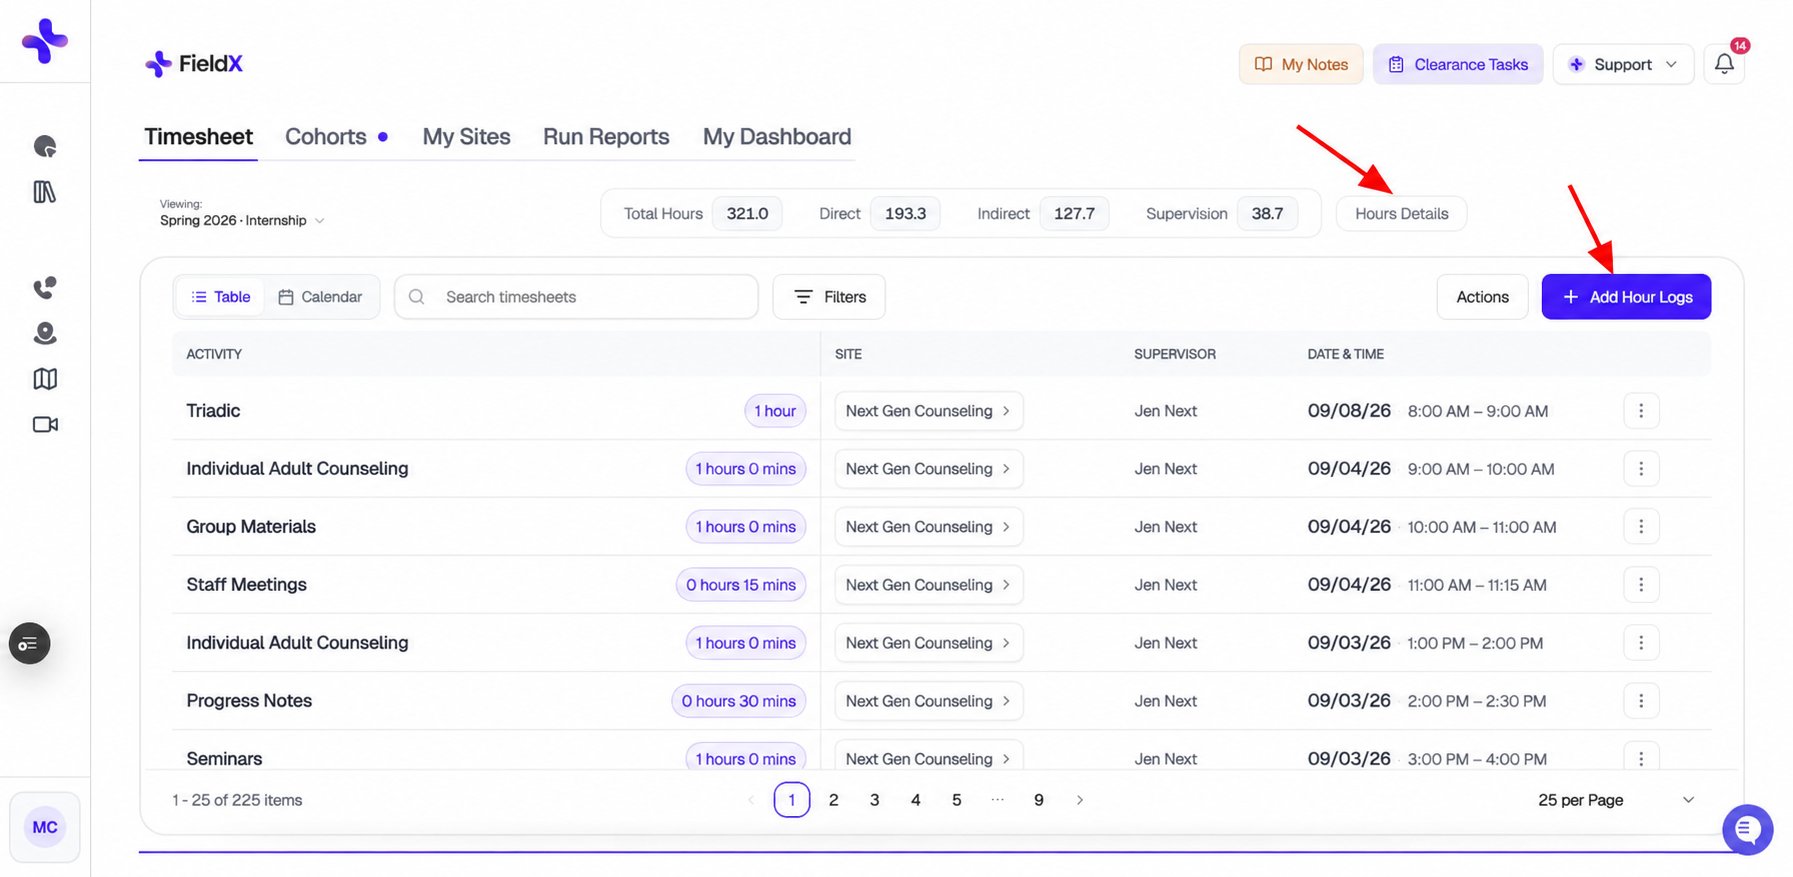
Select Hours Details to review your progress, or Add Hour Logs to record hours.
The header buttons
Across the top of the Timesheet tab you’ll find quick-access buttons:Logging hours
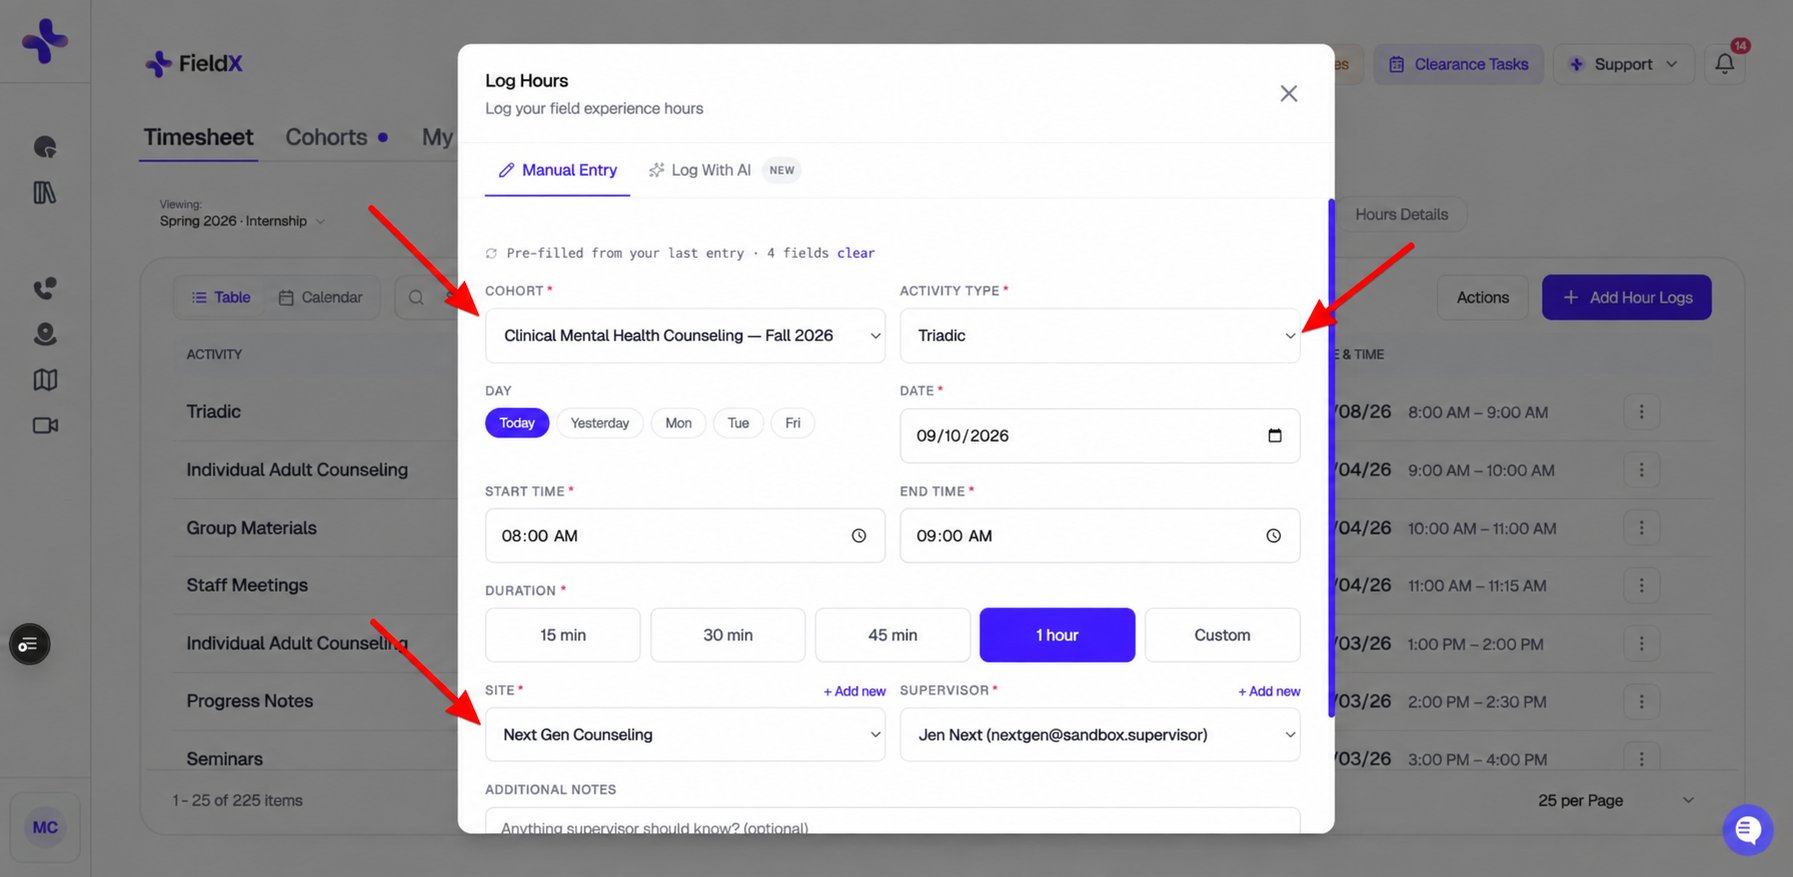
Choose the cohort and activity type, then select the site for this entry.
1
Open the Timesheet tab
Click the Timesheet tab from your Field Experience dashboard. Use the Viewing: dropdown above the totals to choose the term for your hours summary. The table has separate date and filter controls.
2
Click Add Hour Logs
Click Add Hour Logs in the toolbar, then use Manual Entry.If this is your first time logging hours, the one-time Timesheet Logging Agreement modal appears. Read it carefully and click Accept to continue — you can’t log hours until you accept.
3
Fill in the entry
The modal asks for:
- Activity Type — what were you doing? (e.g., Direct Service, Supervision, Documentation)
- Date — when did it happen?
- Start & end time — duration is calculated automatically
- Site — which placement site were you at?
- Supervisor — who supervised this activity?
- Cohort — which class should these hours count toward?
- Additional Notes (optional) — additional context about the session
4
Save the entry
Click Log Hours at the bottom of the modal. The entry appears in your timesheet table as Unapproved until the required approval process is complete.
Reusing a weekly pattern
After you have enough consistent logging history, the manual-entry form may show Draft this week from your pattern. Select Review to turn the suggested entries into an editable batch. Check every date, activity, duration, site, and supervisor before saving. This suggestion appears only when FieldX can identify a pattern in your prior entries. If it is absent, use Manual Entry or Log With AI.If your supervisor isn’t in the dropdown
For a site-supervised activity, select a site first. The supervisor dropdown then lists supervisors linked to that site. You must choose a supervisor before you can save the entry.Add them from My Sites
- Open the My Sites tab
- On the site card, click Add next to My Supervisor
- Pick an existing supervisor or invite them by name and email
Or use Timesheet Actions
Click Actions on the timesheet toolbar, choose Add Supervisor, and follow the form to add them to the correct site.If Add Supervisor is missing
Some programs hide Add Supervisor (and the Add button on My Sites). Switch Supervisor stays in Actions — it only works for people already linked to you. To invite someone new, go to Clearance Tasks. If you’re already approved, click Update Application, then on Add Supervisors click Add new and Invite Site Supervisor. Details: Managing Site Information and Getting Started & Clearance Tasks.Logging hours with AI
For ad-hoc batch entry, the Log With AI option lets you paste a paragraph describing what you did (e.g., from your own notes) — the AI parses it into one or more timesheet entries you can review and confirm before saving.The timesheet table
Use Table and Calendar to switch between the entry list and a calendar. In the table:- Use search and Filters to narrow the entries you see.
- Open a row’s three-dot menu to select See notes, Edit, Duplicate, or Delete an entry. Availability depends on its approval status.
- Use Actions for supervisor tools and Create personal report.
Personal reports
Actions → Create personal report creates a report for your supervisor to sign. Read the explanation in the dialog before continuing: personal reports are independent of your program’s assigned reports and do not count toward cohort goals. Use the reports assigned in Cohorts for your program’s normal approval process. To download an analysis of your own hours, use the separate Run Reports tab.Approved vs. unapproved
Each entry has one of two statuses:- Unapproved — logged but not yet signed off on by your supervisor
- Approved — the required approval process for the entry is complete
Hour totals
At the top of the table you’ll see hours totals by category for the selected period. The categories match your program’s track requirements (e.g., Direct, Indirect, Supervision, Total).Switching between terms
If you’ve been in field experience for more than one term, a Viewing: dropdown appears above the totals bar. Use it to scope the hours summary — and the Hours Details modal — to a specific term.- All terms — combined totals across every placement you’ve had
- A specific term (for example, Fall 2025 · Practicum) — totals, requirements, and progress for just that placement
When you open the Timesheet tab, the dropdown defaults to your current active term. Switching terms updates the totals bar, the progress numbers in Hours Details, and the requirements you’re being measured against — useful when you move from Practicum to Internship and want to compare progress across levels.
The term selector only affects the summary bar and Hours Details modal. The timesheet table below still shows entries based on its own date and filter controls.
If your program pools a level series
Some programs combine a level series — for example, Internship I / II / III — into one shared hour requirement. You log hours in whichever term you’re in, and only the combined total matters. If your track is set up this way:- The Viewing: dropdown shows a Combined option in place of All terms, alongside each of your terms. Combined shows your progress across every term in the series against the single shared requirement.
- When you view one term of the series on its own, the totals show what you logged that term without a per-term goalpost. Your requirement applies to the series as a whole, not to any single term.
- In the Hours Details modal, the series appears as one entry in the Level dropdown, and a Scope dropdown switches between Combined and individual terms. The activity minimums shown there are pooled across the series.
Editing & deleting entries
Open an entry’s three-dot menu and select Edit or Delete. Use Duplicate to start a separate entry with similar details. Approved entries are locked against editing and deletion until a Program Admin unlocks them. Review your changes before selecting Save Changes.See also: Cohorts, Forms & Reports for how cohort tasks and your learning contract work.