

Step 1: Create the new term
1
Open Program Settings
Click Program Settings in the top-right of any page, then go to the Terms and Tracks tab in the sidebar.
2
Add the new term
Scroll to the Academic Terms section and click + Add Term. Enter the term name (e.g., Spring 2026), start date, and end date. Click Create Term.Your new term shows up with an Upcoming chip until its start date, then flips to Active.
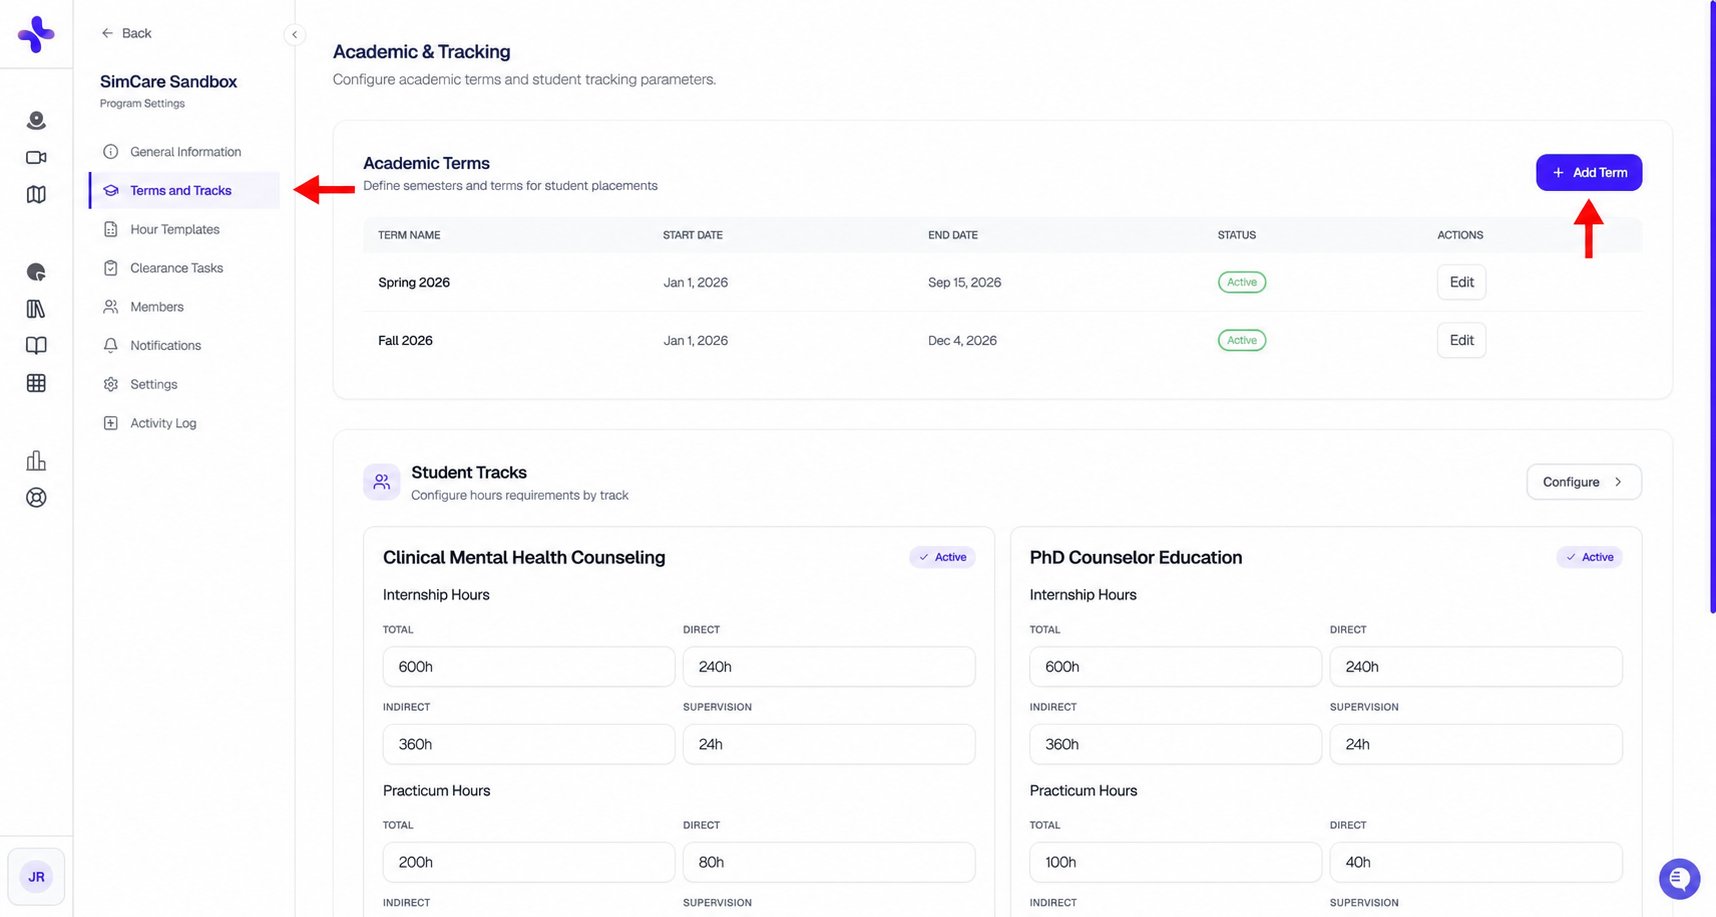
Open Terms and Tracks and use Add Term for the next academic period.
Step 2: Copy the previous cohort
Instead of building each cohort from scratch, use Copy from existing cohort in the create modal.1
Create a new cohort
From the Cohorts tab, click Create Cohort.
2
Pick the source cohort
In the form, use Copy from existing cohort to select last term’s version. This carries over:
- One-time assignments
- Recurring schedules
- Settings (default signing faculty, hours report template)
3
Shift dates
Set the First assignment date to the new term’s start date. Every source assignment’s due date is shifted by the same offset, so the rhythm of the semester is preserved.
4
Pick the new academic term
Select your new term in the Academic Terms field. Student placements are auto-created using this term.
5
Create
Click Create Cohort.
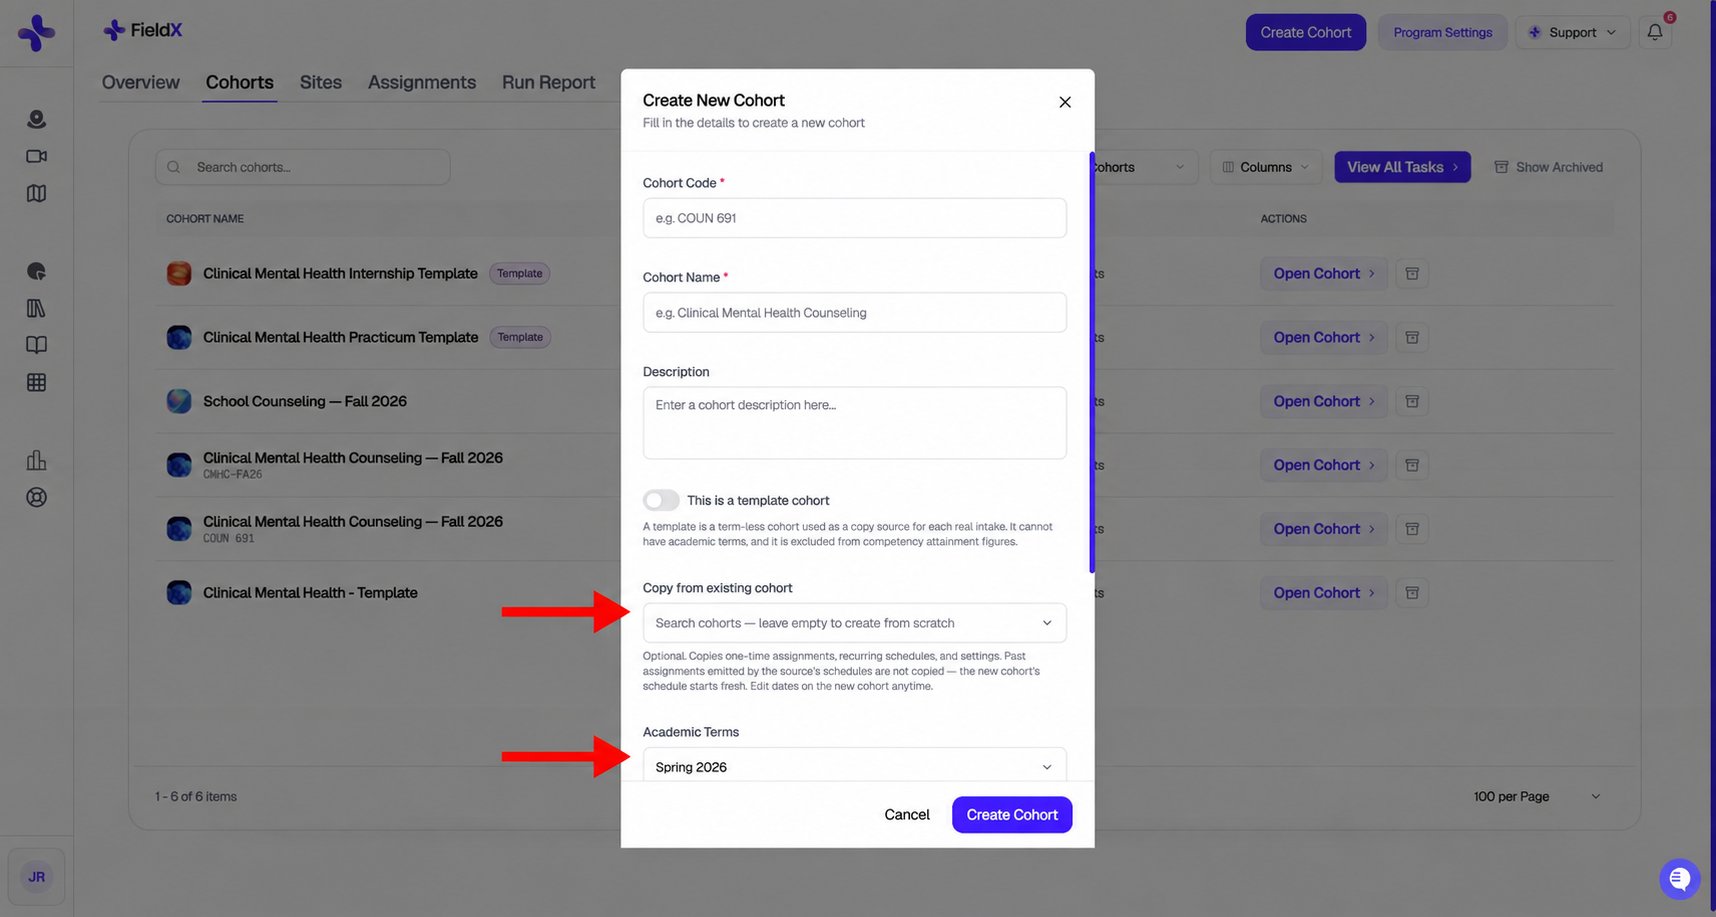
Choose the source cohort, then select the academic term for the new cohort.
Step 3: Move continuing students to the new term
1
Open Members
From Program Settings → Members, switch to the Students sub-tab.
2
Filter by the previous term
Filter the list to show students from the term that just ended (e.g., Fall 2025).
3
Select all
Click the checkbox at the top of the table to Select All.
4
Assign new term
Click Assign Term in the bulk actions bar, then pick the new term (e.g., Spring 2026). You can also click Assign Track if students are moving to a different track.
Step 4: Archive previous cohorts
1
Open the Cohorts tab
Find any cohort that has ended.
2
Archive it
Find the cohort row and click the archive action, then confirm in the prompt that appears. Repeat for each finished cohort.
3
Hide archived cohorts
Click Hide Archived in the header to clean up your view. Use Show Archived any time to see them again.
Archiving does not delete data. It moves the cohort out of your active view while preserving all student hours, forms, and reports. You can Unarchive any time, or Permanently Delete when you’re sure you don’t need the data.