

Finding pending approvals
A few ways to find students waiting for approval:- Overview tab → Tasks button on a student row — open that student’s pending tasks
- Overview tab → student row — students with a pending clearance status are flagged in the table
- Activity Log (Program Settings → Activity Log) — filter by Type: Application Forms
Reviewing a student’s submission
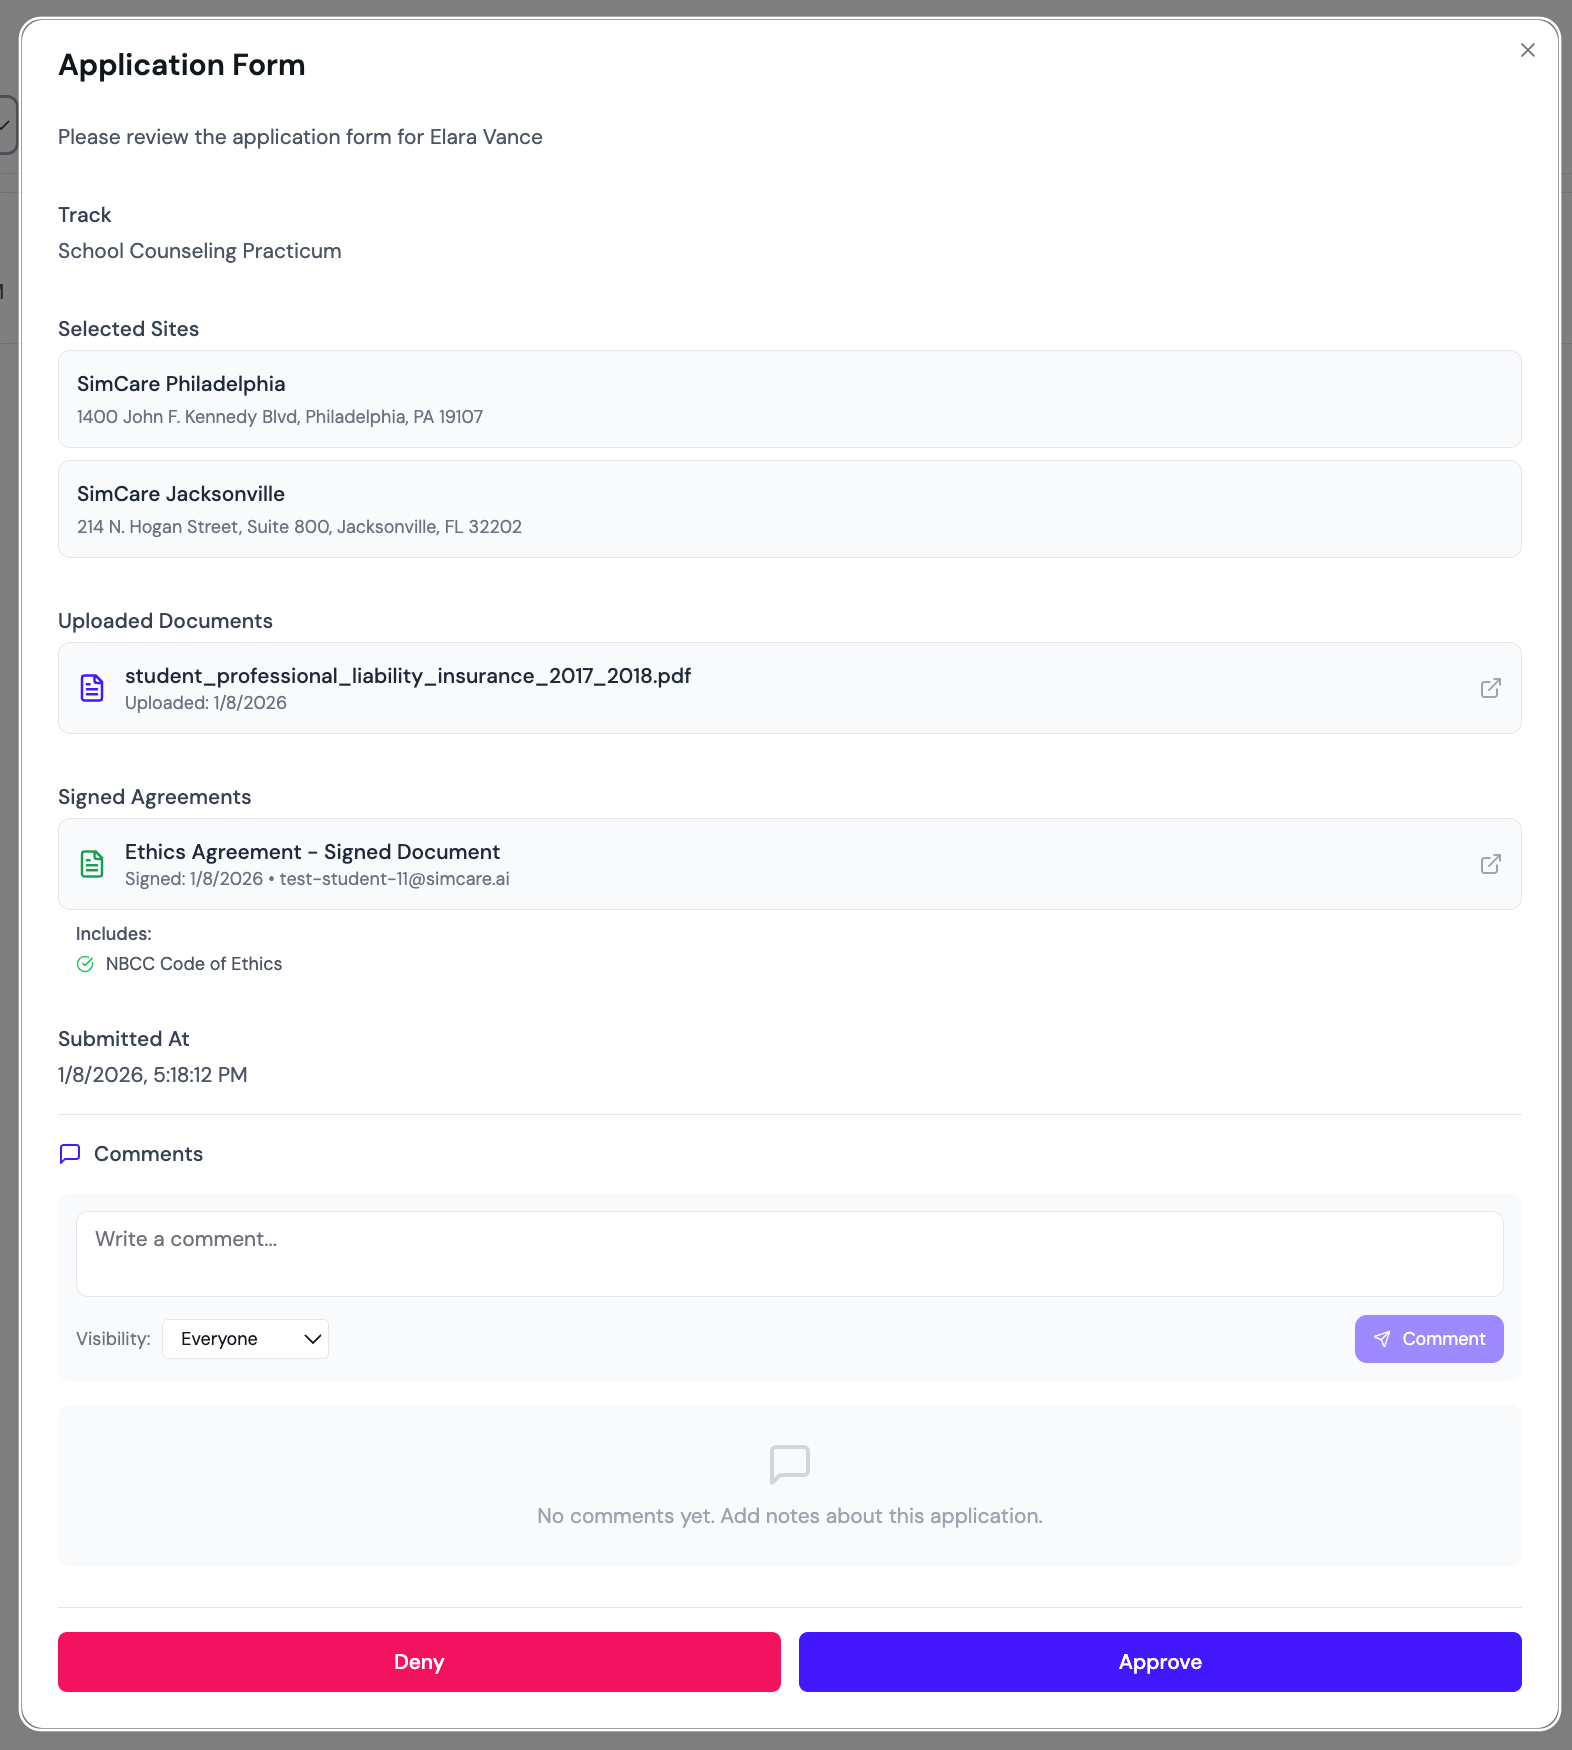
Click any student to open their Student Details modal, then go to Documents → Application and open the application row. The full pre-application appears with every field they entered and every document they uploaded during clearance, including:- Track selection
- Signed agreements
- Selected sites with supervisor contacts
- Liability insurance upload
- Any custom questions, forms, or quizzes you added
Taking action
If the application is inPending status, the application view shows two buttons:
- Approve — grants the student full access to begin logging hours and participating in their assigned cohorts
- Reject — sends the application back. You’ll be prompted to leave a note explaining what needs to be fixed
The student sees your specific feedback the next time they log in, so they know exactly what to correct before re-submitting.
Approving an updated application
Students can also update their own approved application from the Clearance Tasks page (for example, to add a new site or fix a detail). When that happens, a new pending submission from that student appears in your queue while their previous approval stays active — the student keeps full Field Experience access until you review the update. Review it the same way as a first-time application; on approval, the update replaces the previously approved version.Granting a term extension
If your program uses submission windows to close new applications after a term’s cutoff date, you can grant a specific student an extension so they can still select or continue that term — no link or token, they just log in normally. You can start a grant from three places:- Program Settings → Clearance Tasks → Grant Extension — pick the term, the student, and a deadline.
- Program Settings → Terms and Tracks → term row → Extensions — pre-fills the term; pick the student and deadline.
- Program Settings → Members → student row → ⋮ → Manage Clearance — pre-fills the student; pick the term and deadline.
Managing submission windows in bulk
To adjust several terms’ open and close dates without editing each term individually, open Program Settings → Clearance Tasks (the Clearance & Placement page) and click Manage Submission Windows in the header. Every active term appears with editable date fields and a Save button per row. Both buttons only appear when Restrict Applications by Submission Window is enabled under Program Settings → Settings.Per-level and per-track submission windows
By default, a term’s submission window applies to every program level (pre-practicum, practicum, internship, and so on) and every track. If you need to open or close a term for one level while leaving the others alone — for example, closing new practicum applications on Aug 1 but keeping internship open until Sep 15 — you can set a distinct window per level on that term. You can narrow the override further to a specific track when only some specialties need different dates. To set per-level windows:- Open Program Settings → Terms and Tracks and click a term to open Manage Term.
- Save the term first if it’s new — per-level windows can only be edited on an existing term.
- In the Submission Window section, switch the mode toggle from Same for all levels to Set per level.
- Click Manage Level Windows to open the level-window editor.
- Set open and close dates on the All Tracks row to apply an override to every track, or expand a specific track to set dates on that track’s row instead. Expand a track further to override individual levels within it.
- Click Save Changes.
Per-level and per-track windows only take effect when Restrict Applications by Submission Window is enabled under Program Settings → Settings. Until then, every level in every term is open regardless of the dates you set.
Bulk handling
For programs with large cohorts coming through clearance at the same time:- Use Program Settings → Members to sort students by clearance status
- Group students by track or term and review them in batches
- The Activity Log gives you a sortable, exportable history of every approval decision
Next step: Create and assign forms and reports for your students. See Building Forms.